A
few months back I was on the far coast of BC doing some surfing and fishing.
Though we were fishing for halibut, we ended up catching some beautiful spring
salmon instead. So I thought I would
share my favorite way of preparing salmon… the manliest way I could think of…on
wood. Cooking the salmon on a cedar
plank infuses the fish with the most glorious, earthy taste. Add to that the fresh and tangy herb topping,
and a drizzle of creamy cucumber dill sauce and you’ve got yourself a
crowd-pleaser.
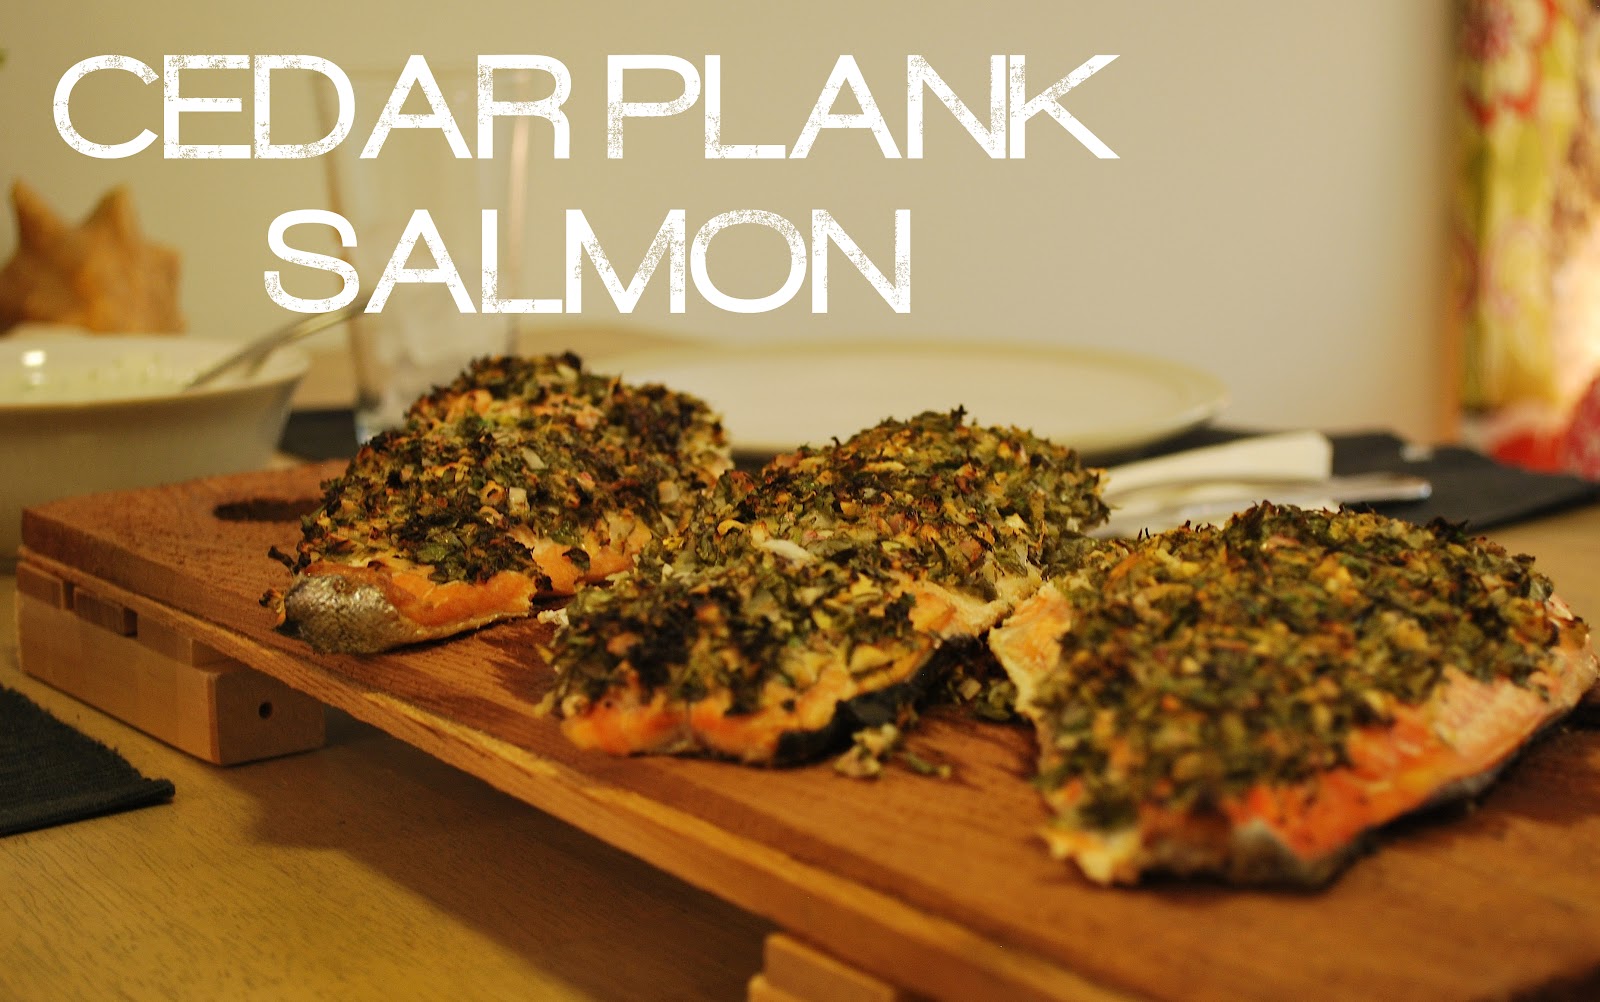
Here
is my recipe for Cedar Plank Salmon... Do try. It’s awesome.
First
step… go fishing. ;)... thats me holding the tiny pathetic ones.
Ingredients
1
untreated Cedar plank
-----
2
Shallots, diced
10
Cloves garlic, minced
3
Tbsp (45 ml) snipped fresh dill
3
Tbsp (45 ml) chopped fresh thyme
2
Tbsp (30 ml) chopped fresh cilantro (or more if you like it)
2
Tbsp (30 ml) lemon zest
2
green onions, chopped
1
tsp (5 ml) Olive Oil
-----
3-4
lb. Salmon fillet
Salt
and freshly ground Pepper to taste
Cucumber Dill Sauce:
¼
English cucumber
¼
tsp (1 ml) Salt
-----
1
cup (250 ml) plain yogurt
½
cup (125 ml) sour cream
1
tsp. (5 ml) lemon juice
Pepper
to taste
-----
3
green onions finely chopped, white part only
2
tsp (10 ml) chopped fresh dill
Preparation Instructions
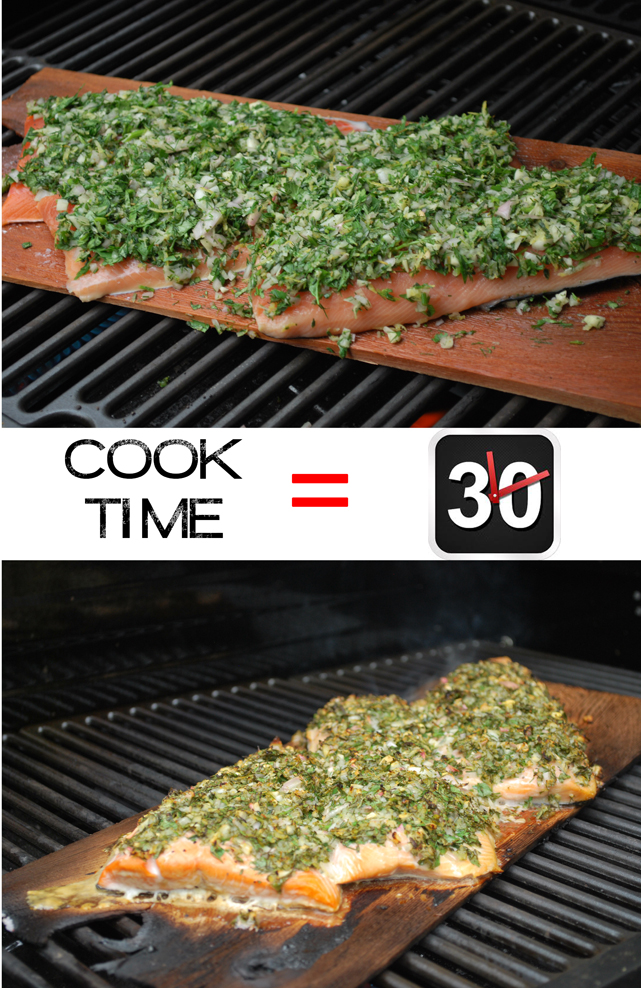
Soak
cedar plank in water for several hours. The longer the better.
In a small bowl, combine shallots, garlic, dill, thyme,
cilantro, lemon zest and juice, green onions and olive oil. Cover and place in the fridge for at least 1
hour to allow the flavors to do their thing and get super tasty. ;)
Place your beautiful salmon on a cedar plank and sprinkle
with salt and pepper. Cover the salmon with the herb mixture.
Set the plank on
the preheated BBQ and close the lid. Cook for 30 mins on medium to high heat,
until the fish flakes easily with a fork… depending on how well-done you like
your salmon. (I like mine a little more rare).
To prepare Cucumber Dill Sauce, finely chop cucumber, toss
with salt and let stand for 15 mins.
----
Combine yogurt, sour cream, lemon juice, pepper, onion and
dill.
---
Drain water from cucumber and add to yogurt mixture.
Serves 8
I served mine with a bed of spiced quinoa and oven roasted asparagus sprinkled with feta and balsamic reduction. Enjoy!

.JPG)


.JPG)